
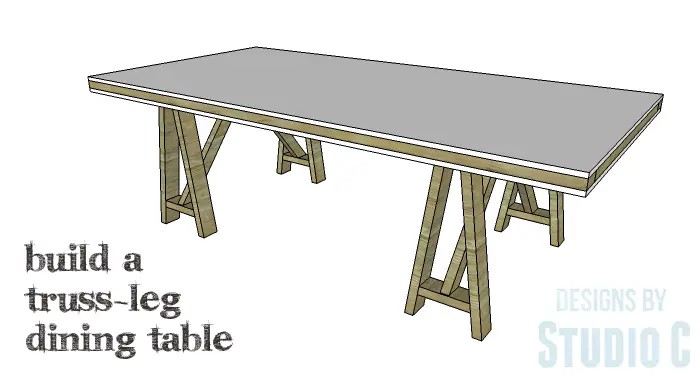
Build a Truss-Leg Dining Table
An Easy to Build Modern Table
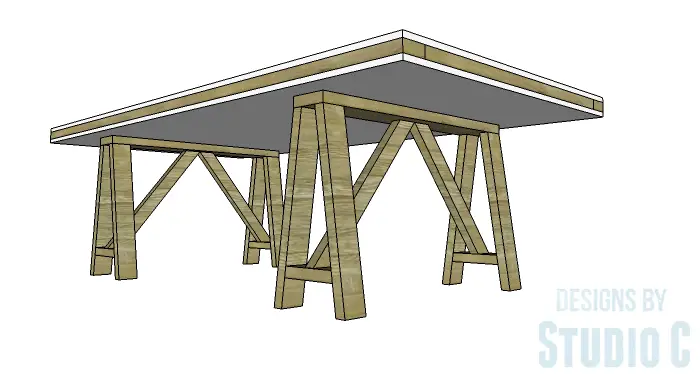
This table has to be one of the easiest builds ever… Combined with its large size and modern/vintage vibe, how can it be passed up? The DIY furniture plans to build a Truss-Leg Dining Table feature sawhorse-style frames for the legs and a plain, easy-to-build top with exposed plywood edges. This fabulous table can be completed in a weekend and won’t break the bank!
Materials:
- 2-1/2″ pocket hole screws
- 2-1/2″ screws
- 3″ screws (<– affiliate link!)
- 1-3/4″ brad nails
- Wood glue
- Sandpaper (100, 150, 220 grits)
- Finishing supplies (primer & paint, or stain, sealer)
Tools Needed:
- Circular saw, jigsaw or miter saw
- Drill
- Countersink bit
- Pocket hole jig
- Pneumatic brad nailer with compressor
- Sander
Lumber:
- 10 – 2×4 at 8′
- 1 – 2×6 at 8′
- 2 – 4′ x 8′ sheets of 3/4″ plywood
Cut List:
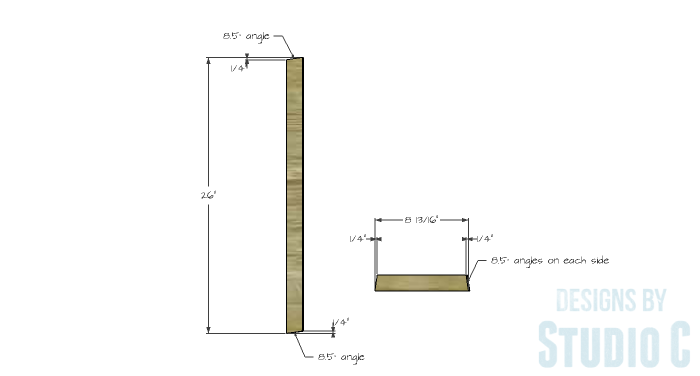
- 8 – 2×4 at 26″ – Legs
- 4 – 2×4 at 8-13/16″ – Leg Stretchers
- 2 – 2×6 at 40″ – Leg Assembly Top
- 4 – 2×4 at 28″ – Leg Bracing
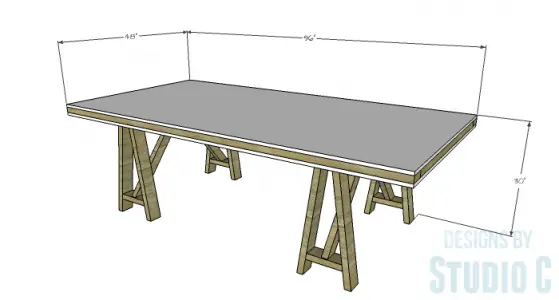
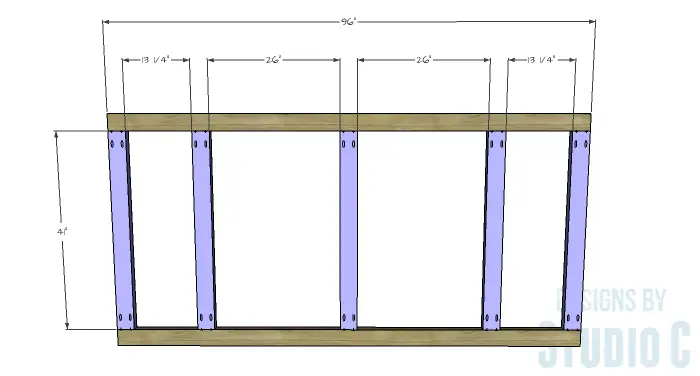
- 2 – 2×4 at 96″ – Top Frame
- 5 – 2×4 at 41″ – Top Frame
- 2 – 4′ x 8′ sheets of 3/4″ plywood – Top
Click on the drawings for a larger view!
Step One
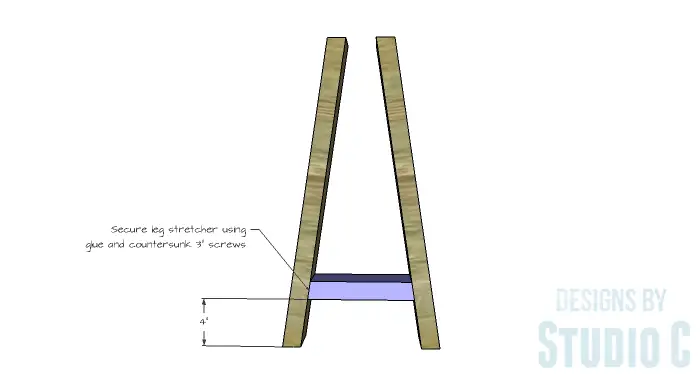
Cut the pieces for the legs and the leg stretchers to length. Cut an 8.5° angle in the pieces as shown in the drawing. Secure the stretcher to the lower edge of the legs (locating the stretcher 4″ up from the floor) using glue and countersunk 2-1/2″ screws from the outside of the leg into the ends of the stretcher.
Step Two
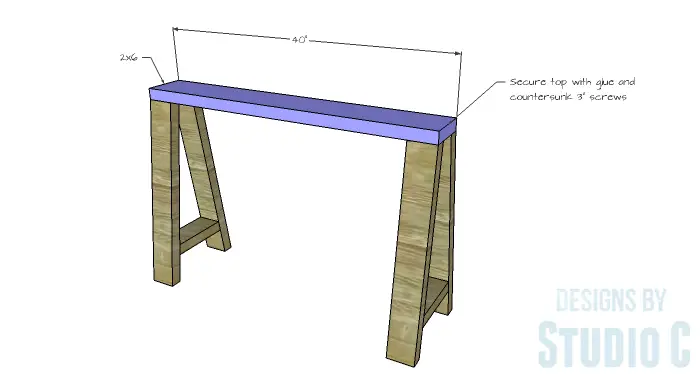
Cut the pieces for the leg assembly top. Secure the legs to the top using glue and 2-1/2″ screws through the top into the top end of the legs.
Step Three
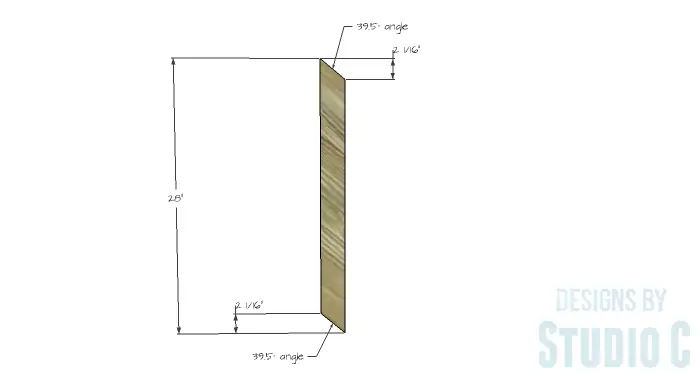
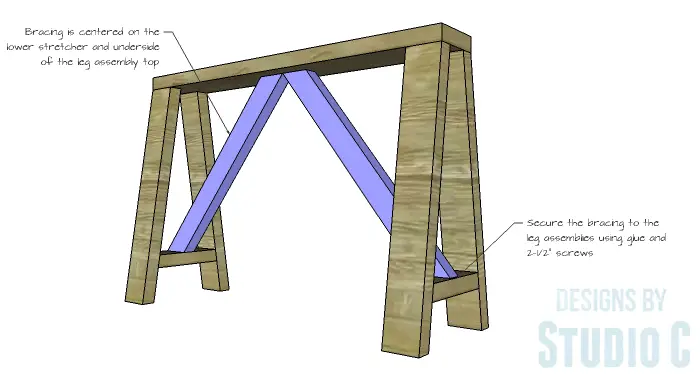
Cut the pieces for the bracing and cut a 39.5° angle in each end (refer to the drawings). Secure the bracing to the leg stretchers and the underside of the leg assembly top using glue and toenailed 2-1/2″ screws.
Step Four
Cut the pieces for the top frame. With the pocket hole jig set for 1-1/2″ material, drill pocket holes in each end of the shorter 2×4 pieces. Assemble the frame as shown using glue and 2-1/2″ pocket hole screws.
Step Five
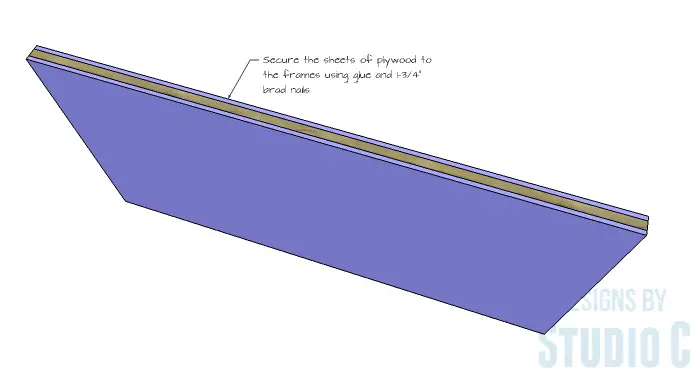
Secure the sheets of plywood to each side of the top frame using glue and 1-3/4″ brad nails. A router with a straight bit can be used to clean up the edges of the plywood along the frame.
Step Six
Finish the legs and top as desired.
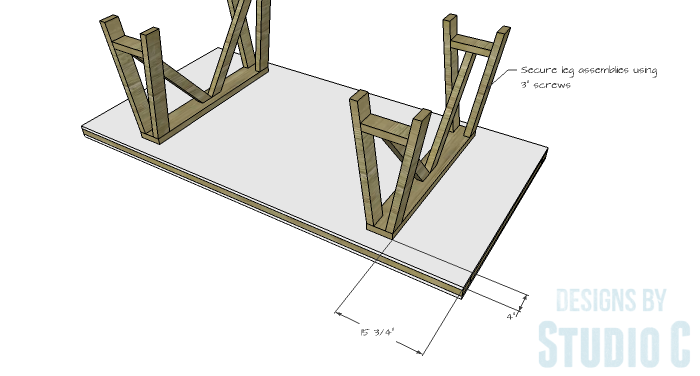
Secure the top to the leg assemblies using 3″ screws through the underside of the leg assembly top into the underside of the table top. Do not use glue! This way the table can be taken apart and easily moved. The assemblies (sawhorses) are positioned under one of the top frame pieces for security.
This massive table if perfect for any gathering or dinner party, and if constructed out of weather-resistant materials, would be perfect for a patio or deck! Have any questions about the DIY furniture plans to build a Truss-Leg Dining Table? Leave a comment below!
Originally posted 2016-01-20 08:00:27.