
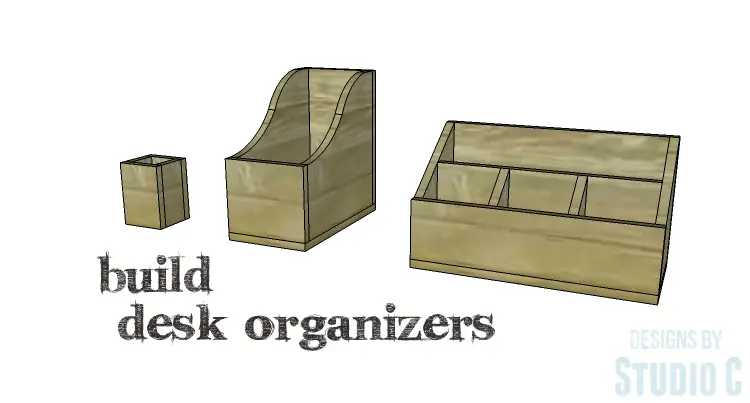
DIY Plans to Build Desk Organizers
Organize a Desk with Easy to Build Caddies
Desk organization is always a must and quality desk organizers can be really expensive. Here is an inexpensive set you can build and customize to match your decor! The DIY plans to build Desk Organizers feature a pencil cup, a file holder, and a caddy with divided spaces, all constructed out of 1/2″ plywood. The entire set can be constructed in a few hours!
Materials:
- 1-1/4″ brad nails
- Edge banding, if desired (<– affiliate link!)
- Wood glue
- Sandpaper (100, 150, 220 grits)
- Finishing supplies (primer & paint, or stain, sealer)
Lumber:
- 1 – 2′ x 4′ sheet of 1/2″ plywood
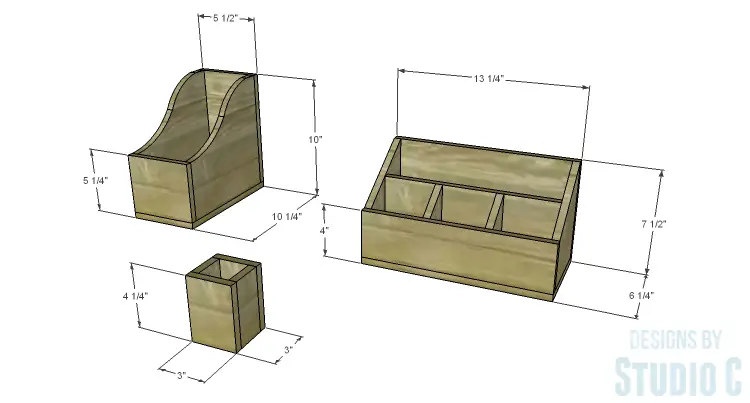
Cut List:
- 2 – 1/2″ plywood at 2″ x 4-1/4″ – Pencil Cup Sides
- 1 – 1/2″ plywood at 2″ x 2″ – Pencil Cup Bottom
- 2 – 1/2″ plywood at 3″ x 4-1/4″ – Pencil Cup Front & Back
- 1 – 1/2″ plywood at 5-1/2″ x 10-1/4″ – File Holder Bottom
- 2 – 1/2″ plywood at 9-1/2″ x 9-1/2″ – File Holder Sides
- 1 – 1/2″ plywood at 4-3/4″ x 5-1/2″ – File Holder Front
- 1 – 1/2″ plywood at 5-1/2″ x 9-1/2″ – File Holder Back
- 1 – 1/2″ plywood at 6-1/4″ X 13-1/4″ – Caddy Bottom
- 2 – 1/2″ plywood at 5-1/4″ x 7″ – Caddy Sides
- 1 – 1/2″ plywood at 5″ x 12-1/4″ – Caddy Center Dividers
- 2 – 1/2″ plywood at 2-3/8″ x 5″ – Caddy Center Dividers
- 1 – 1/2″ plywood at 3-1/2″ x 13-1/4″ – Caddy Front
- 1 – 1/2″ plywood at 7″ x 13-1/4″ – Caddy Back
If using edge banding, it will be applied to the exposed edges prior to assembly.
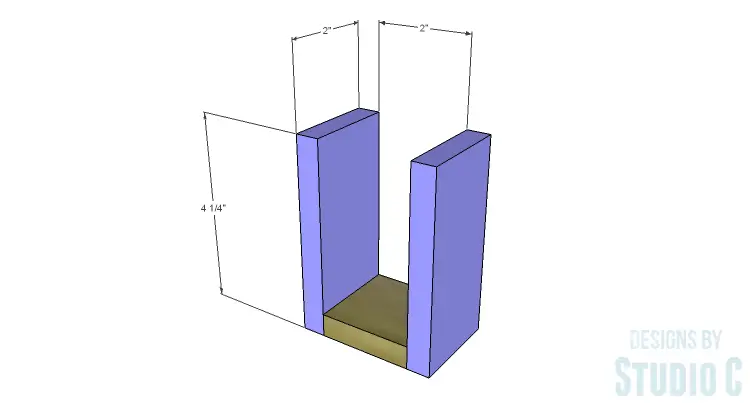
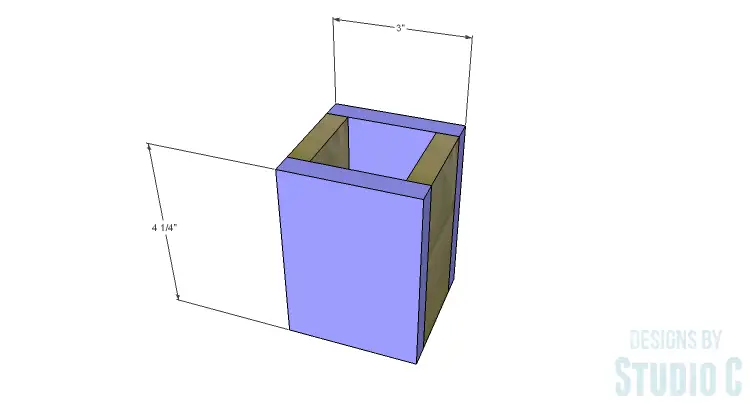
Pencil Cup
Cut the pieces for the pencil cup. Secure the sides to the bottom using glue and 1-1/4″ brad nails. Secure the front and back using glue and 1-1/4″ brad nails.
File Holder
Step One
Cut the pieces for the file holder. Draw the curves on the side pieces maintaining the front and back dimensions. Cut out the curves using a jigsaw or a bandsaw.
The sides will be flush with the side edges of the bottom, and will be positioned 1/2″ back from the front and back edges of the bottom. Secure the sides to the bottom using glue and 1-1/4″ brad nails.
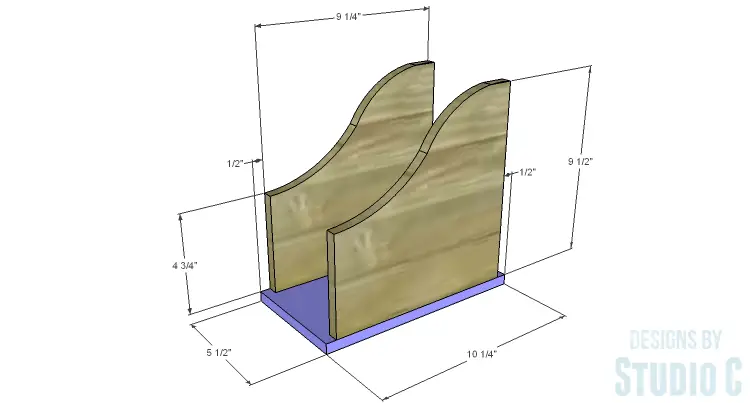
Step Two
Secure the front and back pieces to the side pieces using glue and 1-1/4″ brad nails.

Caddy
Step One
Cut the pieces for the caddy. Draw the angles on the sides and the center pieces, then cut using a jigsaw or a bandsaw. Secure the sides to the bottom using glue an 1-1/4″ brad nails. The sides will be flush with the side edges of the bottom, and will be positioned 1/2″ back from the front and back edges of the bottom.

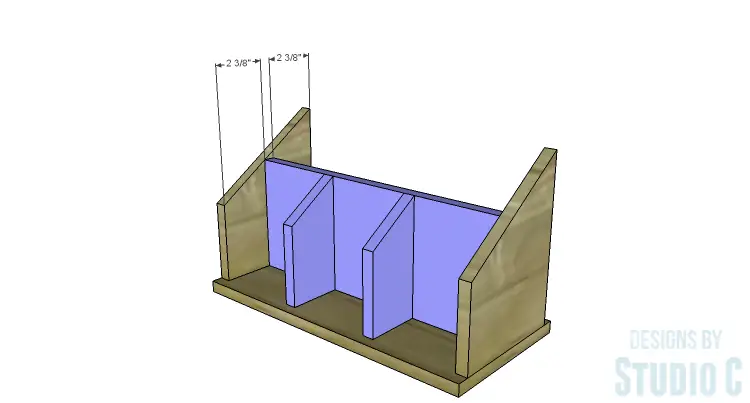
Step Two
Assemble the center dividers using glue and 1-1/4″ brad nails. Secure the center dividers to the sides and bottom using glue and 1-1/4″ brad nails.

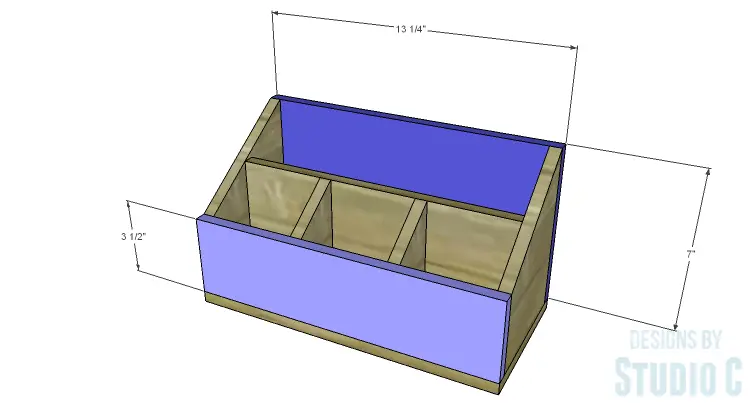
Step Three
Secure the front and back pieces to the side pieces using glue and 1-1/4″ brad nails.
Finish as desired.
The desk organizer pieces would great to organize art supplies for the kiddos, makeup and hair accessories in the bathroom, and craft supplies! Have any questions about the DIY plans to build Desk Organizers? Leave a comment below!
Originally posted 2015-02-16 08:00:56.
[…] DIY Desk Organizers […]
what joints are used for this??
They are regular butt joints secured with brad nails.