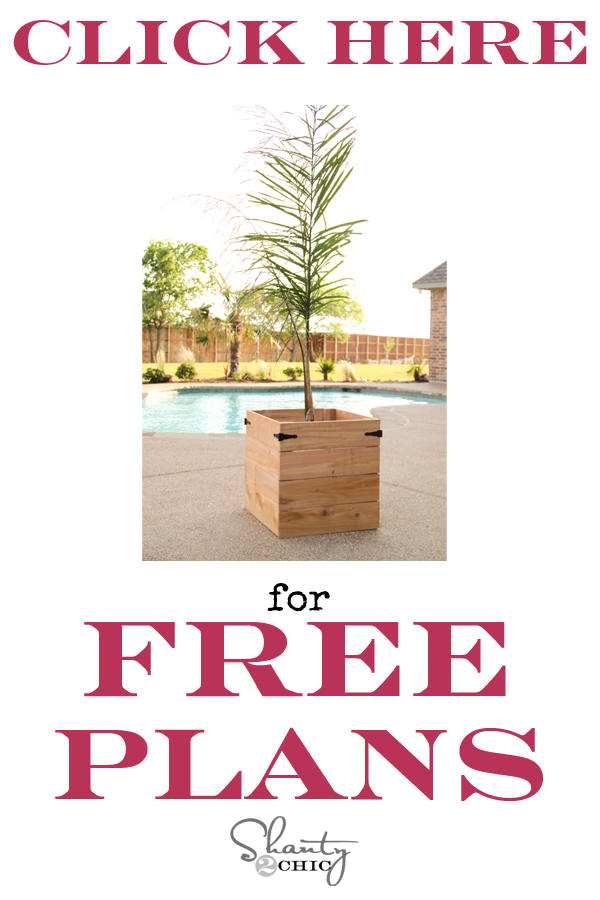
Hey there! I love this project today! It’s super easy, requires minimal tools and it’s quick and cheap – doesn’t get any better right? This cedar planter box is awesome!
 Did I mention it’s versatile? 🙂 So, here’s the story! We decided to have friends and family over for a cook out, this weekend. Being in a new house (you can check out my house building journey HERE), I have focused all of my time building furniture for the inside. Well, the outside was neglected and I wanted to do a little something to spruce it up before we had company over. I decided to build a few faux planter boxes out of cedar fence planks. This cedar planter box is just what I needed!
Each box was under $10 and you can easily customize the size! Here’s what I did!
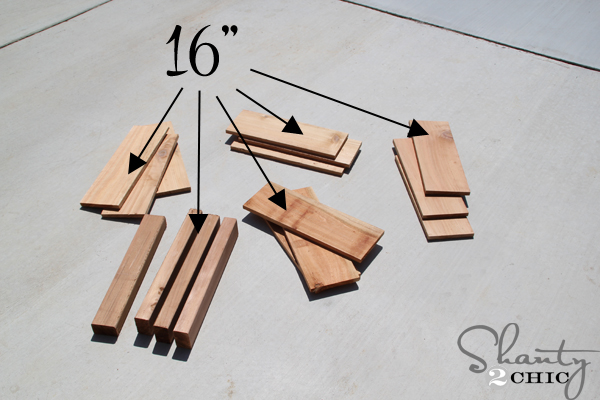
 I cut enough fence material to build 2 boxes. For the smaller box, I cut 4 2×3 fence posts at 16″ and 12 1×6 planks at 16″. For the larger one, I cut 4 2×3’s at 22″ and the 1×6 planks at 22″, as well. If you don’t have a saw, the one below is perfect for small projects like this!
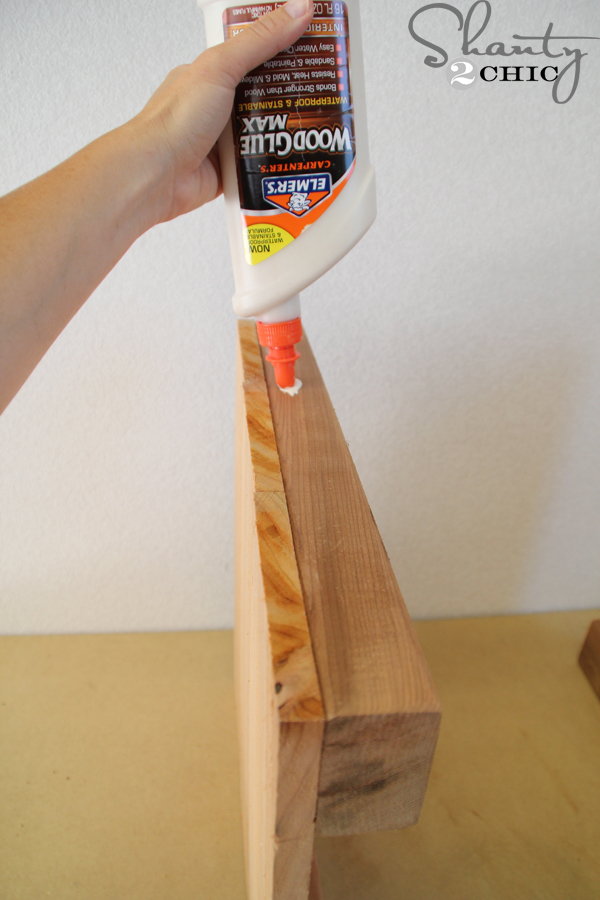
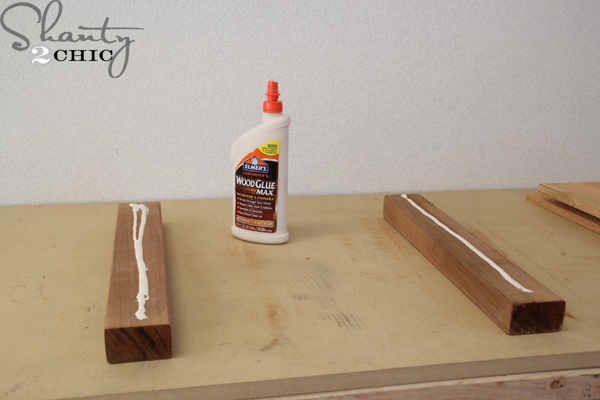 I applied wood glue to 2 2×3’s (this is interior/exterior wood glue)!
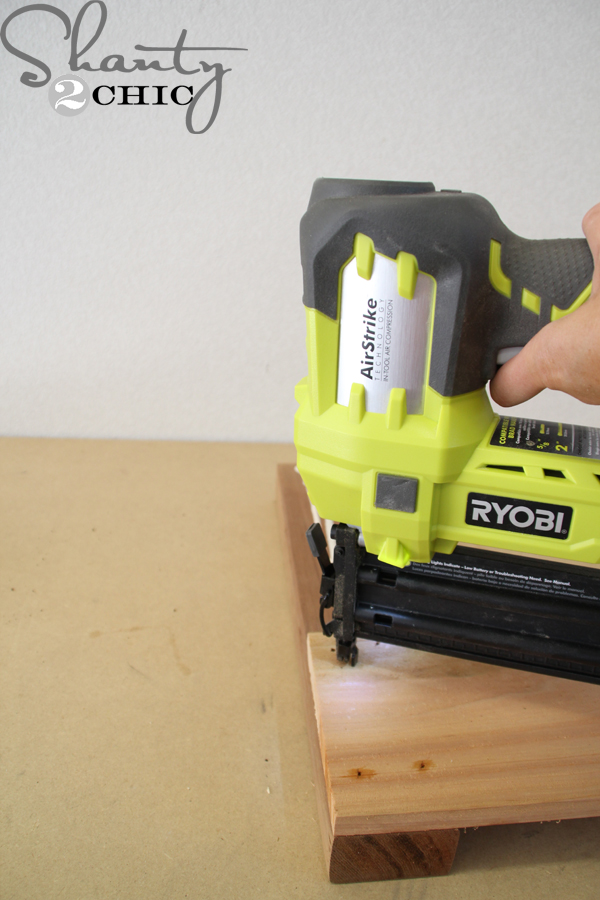 Then I used my Ryobi Airstrike Nailer to attach the fence planks to the 2×3’s. I kept these flush with the ends of the 2×3’s. For the small planter I attached 3 planks and for the larger one, I attached 4 planks. Make 2 of these sides for each box.
 Next, it was time to attach the sides. Flip them on the ends and apply more wood glue then follow up by nailing more fence planks, flip it around and add the final planks!
 Easy!!!
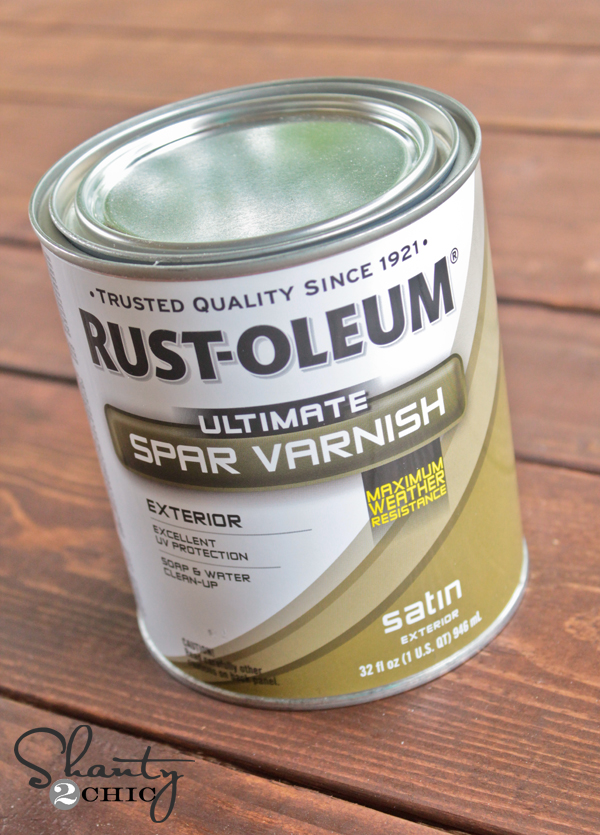 I added 1-coat of Rust-Oleum Spar Varnish to the entire box, inside and out and then dropped a potted plant inside!
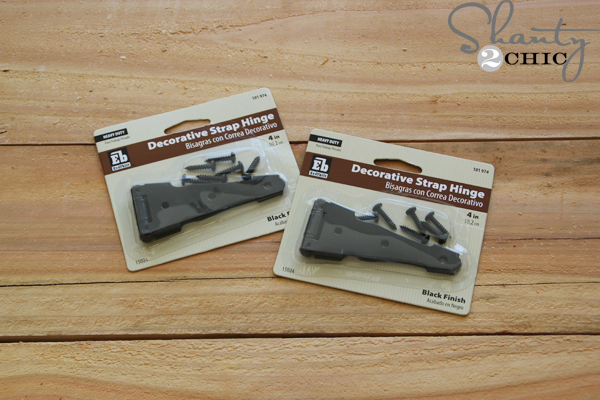 You can hunt the fence hardware isle at your local hardware store and find tons of decorative options if you like! I added these hinges to the large planter
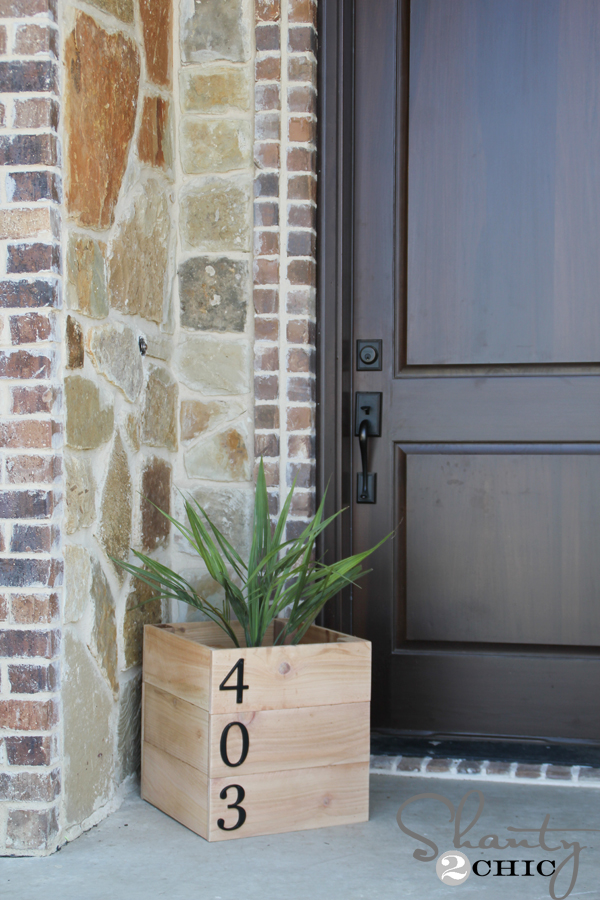
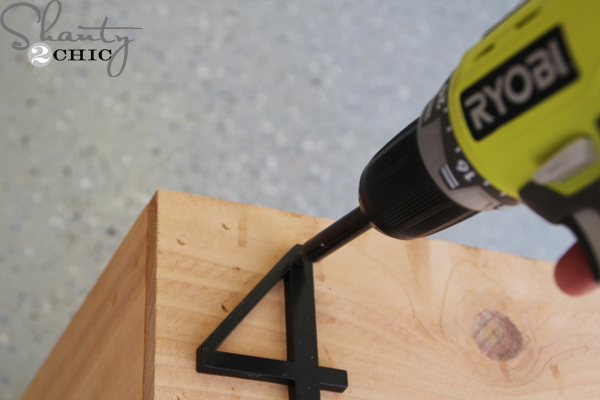 And I chose to use our house address numbers on the smaller one! Using my Ryobi 18-Volt drill to attach them all!
I put the large box around a tree on our back patio
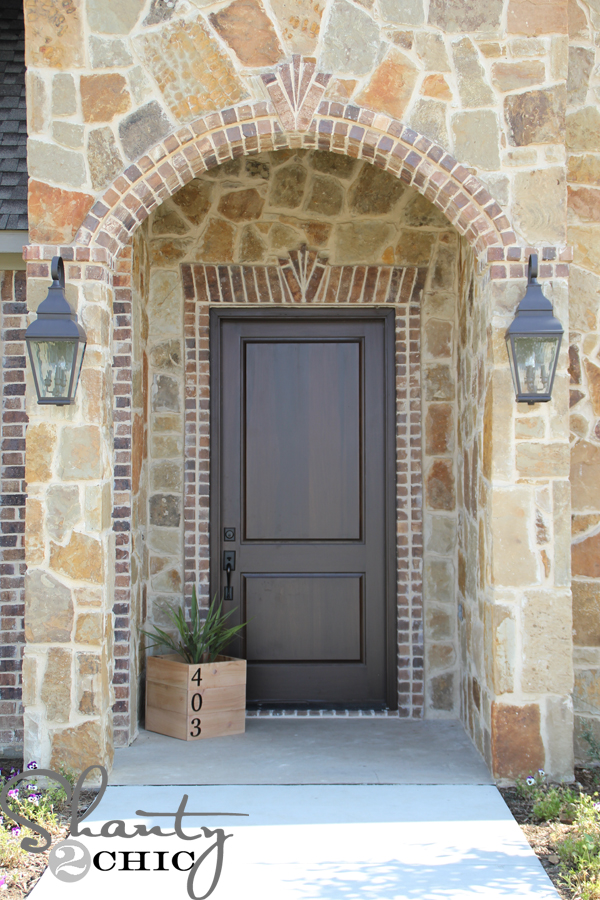 and the smaller one out on our front porch!

This project took all of 30 minutes!
And…. I’ve added some printable plans for each cedar planter box below to make it easier for ya! Click the images to print them for free 🙂
Thanks so much for stopping by!
~Ashley


This looks like a great little project… One question though, how is the bottom of the planter put together? The sides make sense to me, but I’m not getting how the bottom fits in.
That was my question as well, what does the bottom look like? Does this planter just sit over a pot?
Hey, this is just a box that goes around the bucket 🙂
Mine came out a little more weathered because I used the old boards from my repaired fence. Never did a project like this before and I really love it! (Looks much better in person).
Awesome – mine ended up a little smaller because of the left over scraps- I also painted the numbers on because I was too lazy to stop at the store.
So cool and great idea! Thanks for the idea.
these are awesome! Ive been searching for modern DIY planter boxes and here they are!!! I’m definitely going to make these!!